

I have dreamed about opening a brand new library for as long as I can remember! The thought of being able to choose each and every book was exhilarating to me. Not to mention being able to design and decorate the library from the very beginning! EEE!! Well, if you happened to notice my absence the last year from the blogging world, you now know the main reason why! I had the honor of opening a brand new library at an elementary school that opened this past school year. As you can imagine, I was on the top of the world!
To say it’s been an ENORMOUS amount of work opening a brand new library is an understatement! Anyone who has done this will be the first to tell you that it takes A CRAZY AMOUNT of hours! I spent most of that time planning how to be as organized as possible. It occurred to me in the middle of all that lovely chaos that other people might soon be opening their own brand new library. So I made a mental note to share everything I created in opening my brand new library. My hope was to share this information with you so that your process can go as smoothly as possible. (Be watching my future posts for more information, freebies, and new products!)
Getting started: Quirk #1
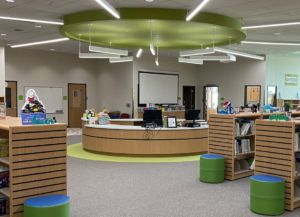
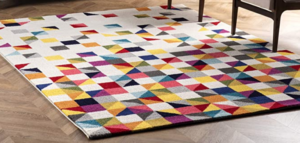
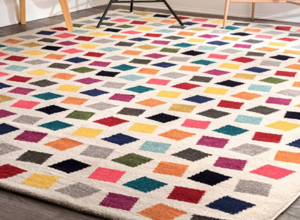
I have a small quirk… I need my environment to be pleasing before I can get to work on everything else. So as soon as I knew I was going to open a new library, I found out as much as I could about the color scheme and began planning! I found out that there would be a large lime-green circle light fixture over the circulation desk, and most of the colors in the school were teal, orange, yellow, and blue. There would be 2-3 large areas that could be used for teaching areas. So the first thing I went looking for were carpets for these areas that complimented the color scheme. I was so excited to find the first carpet (I fell in love with the triangle/square pattern). The second carpet reminded me of books, and complimented the other rug and the circulation area perfectly.
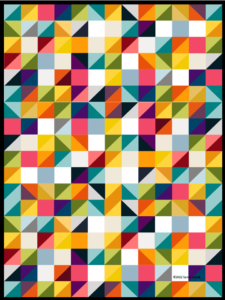
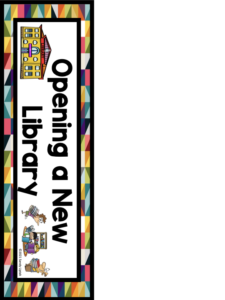
Using the pattern in the carpets for inspiration, and the colors for our school’s color scheme, I created the abstract geometric design below that I would use for all my signage.
Next Step: Quirk #2
My second quirk is that I am a HUGE organizational maniac (LOL and I mean that with all the love in my heart! ) So I knew right away I was going to have to figure out a way to help keep myself organized, manage all my orders, and keep track of everything I was doing. One of the first things I purchased was 4-inch binder (affiliate link) to hold everything in one place.
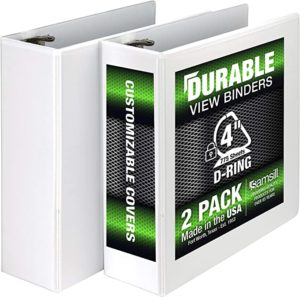
Then I made a front cover, back cover, and spine label to make it fun, using the abstract geometric design I created.


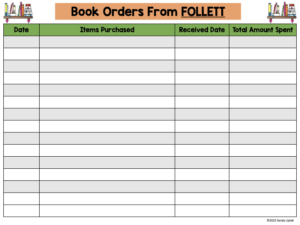
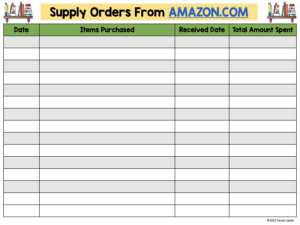
I labeled dividers in the binder for each of the vendors I was using with record sheets to keep track of my spending. Book orders are highlighted “orange” and items for supplies/other are highlighted “yellow”.
Step 3: Even More Organized
To keep track of how much money I was spending and which vendors I was using, I created a google spreadsheet. There are 3 tabs at the bottom for different forms: 1) Funds for Books, 2) Funds for Supplies, and 3) Section Totals. You can make a copy of this for free here!
The first tab was an overall look at the funds spent on books.
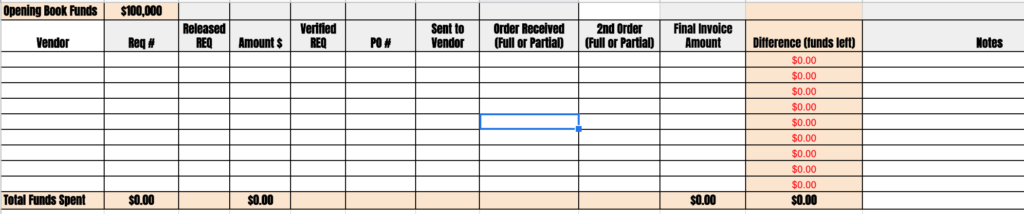
There are columns for:
- Opening budget amount (I put $100,000 but you can change that to fit your school’s budget.)
- Vendor Name
- Requisition Number : the number of the request
- Released REQ – the date when I released it for approval
- Amount $ – to amount of the request
- Verified REQ – the date my principal okayed the requisition
- PO# – the Purchase Order number
- Sent to Vendor – the date I sent the PO to the vendor with the order
- Order Received – the date when I received the order and if it was a full order or partial
- 2nd Order – the date I received the 2nd part of the order and if it was full order or another partial (*If there was a third partial order I put it in the notes section).
- Final Invoice – the total amount paid for the PO
- Difference – any money left over from the original PO amount to what had been received (this was important to me so I knew what “extra” money I still had to spend.
- Notes – names of contacts, 3rd or more partial shipments received, or any other comments necessary to remember
The second tab was an overall look at the funds spent on supplies.
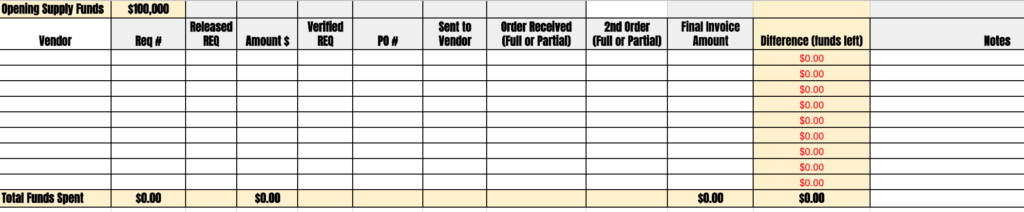
(I set it up exactly as I did the book funds, but ended up not needing to use all the columns as most supplies can FULL and not partial.)
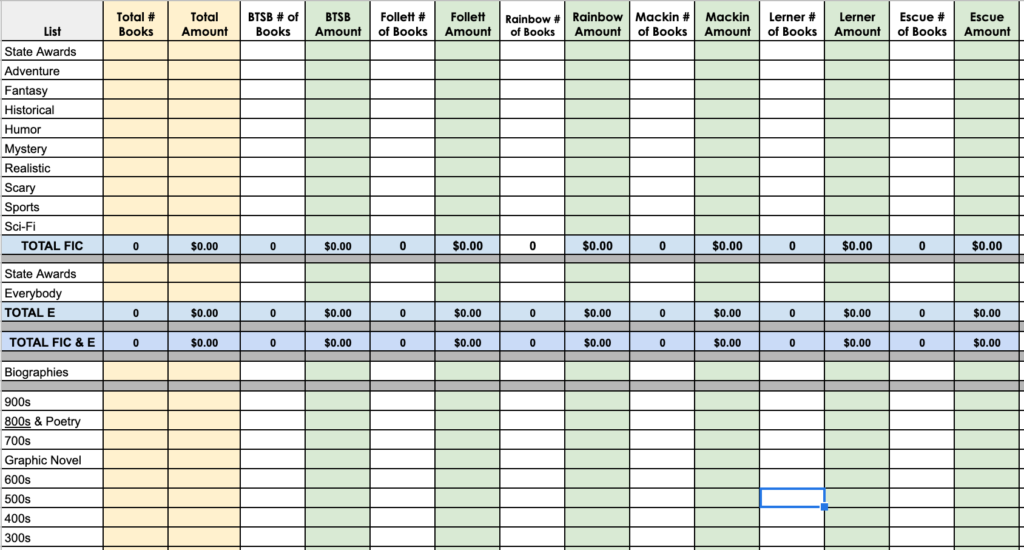
The third tab was my way of making sure I had a balanced collection.
If you would like to get a copy of these Google tracking forms that I created, you can get them for free here. All the binder covers and forms I shared on this blog post are found here at my TpT store.
Next week I’ll be posting about all the other binders I use to keep myself organized in the library! I wrote about that a few years ago on my blog here. Stay tuned for links to all my newly updated binders and forms!
Happy Reading!


Resources for librarians, teachers, parents, & grandparents